

Table of Contents
アプリのローカル通知(Local Notification)の設定方法がiOS10で変更になりました。
今回は、新しいローカル通知の基本的な設定方法について紹介します。
非推奨になった通知設定
今までは、アプリ内で通知を使う場合、UIUserNotificationSettings を用いて以下のように設定していました。
        // iOS10で非推奨になった設定方法
        let notificationSetting = UIUserNotificationSettings(types: [.alert, .sound, .badge], categories: nil)
        application.registerUserNotificationSettings(notificationSetting)
しかし、iOS10向けの環境では、以下のように警告が現れます。

警告によると、UIUserNotificationSettings の代わりに、UNUserNotificationSettings を使用するべきとされています。
UNUserNotificationSettings を使った通知設定例
実際に UNUserNotificationSettings を使った通知の設定サンプルを以下に示します。
プロジェクトを新規作成してできる ViewController.swift を以下のように書き換えます。
import UIKit
import UserNotifications // これのインポートが必須

class ViewController: UIViewController {

    override func viewDidLoad() {
        super.viewDidLoad()

        // 通知を使用可能にする設定
        let center = UNUserNotificationCenter.current()
        center.requestAuthorization(options: [.alert, .sound, .badge]) {
            (granted, error) in
            // エラー処理
        }

        // 通知自体の設定
        let content = UNMutableNotificationContent()

        content.title = NSString.localizedUserNotificationString(forKey: "通知タイトル", arguments: nil)
        content.body = NSString.localizedUserNotificationString(forKey: "通知するメッセージ", arguments: nil)
        content.sound = UNNotificationSound.default()

        // アプリを起動して5秒後に通知を送る
        let trigger = UNTimeIntervalNotificationTrigger(timeInterval: 5, repeats: false)

        let request = UNNotificationRequest(identifier: "my-notification", content: content, trigger: trigger)

        // 通知を登録
        center.add(request) { (error : Error?) in
            if error != nil {
                 // エラー処理
            }
        }
    }

    override func didReceiveMemoryWarning() {
        super.didReceiveMemoryWarning()
    }
}
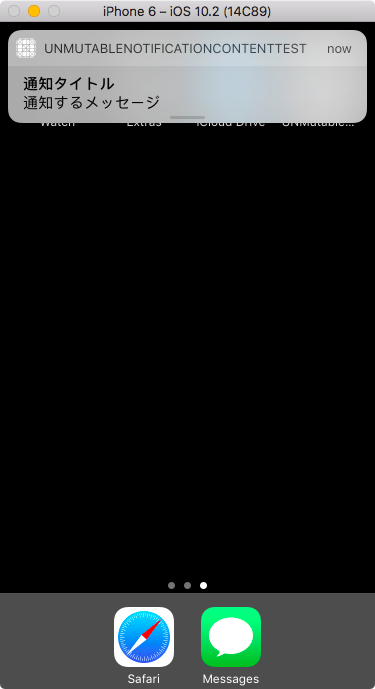
このサンプルアプリを実行すると、5秒後に以下のような通知を受け取ることができます。
サンプルコードの解説
まず、通知を使うためのフレームワークである UserNotifications をインポートします。
import UserNotifications
そして、UNUserNotificationCenter.current() によって、通知センターのオブジェクトを受け取り、そのオブジェクトに対して利用する通知タイプの許可設定を行います。
        // 通知を使用可能にする設定
        let center = UNUserNotificationCenter.current()
        center.requestAuthorization(options: [.alert, .sound, .badge]) {
            (granted, error) in
            // エラー処理
        }
この部分が冒頭の、非推奨になった書き方の新しい書き方です。
実際に通知のメッセージなどを設定するには、UNMutableNotificationContent を利用します。あとは、通知のタイミングなどを設定してあげれば今までと同じように通知を送信することができます。
「何秒後」ではなく、時間を指定して通知を送るには、トリガーとして UNCalendarNotificationTrigger を使用します。
例えば、その日の10時30分に通知を設定する場合は以下のように書きます。
...

// 時間を指定して通知を送信
var fireDate = DateComponents()
fireDate.hour = 10
fireDate.minute = 30
let trigger = UNCalendarNotificationTrigger(dateMatching: fireDate, repeats: false)

...
時間として渡すクラスは Date ではなく DateComponents であるので注意して下さい。
古いiOSにも対応するために
上記の新しい通知の設定方法は、iOS10より古いバージョンでは動作しません。そのため、古いバージョンで通知を設定するには従来の通知のコードも残す必要があります。
アプリが動作しているiOSのバージョンによってメソッド内のコードを使い分けるには、以下の条件分岐を利用できます。
if #available(iOS 10.0, *) {
    // 新しいiOSのコード
} else {
    // 古いiOSのコード
}
メソッド自体をバージョンによって認識させないようにするには、メソッド名の前に @available を記述します。
@available(iOS 10.0, *)
func メソッド名 {
    print("iOS10以降のみ")
}
アプリがフォアグラウンドの状態でも通知を受け取るには UNUserNotificationCenterDelegate のメソッドを使用します。詳しくは以下のドキュメントをご覧ください。
UNUserNotificationCenterDelegate – UserNotifications | Apple Developer Documentation
以上、iOS10からの新しい通知の設定方法でした。
参考
UNUserNotificationCenter – UserNotifications | Apple Developer Documentation
ピンバック: [Swift] カレンダーや時刻のデータを扱う DateComponents - JoyPlotドキュメント