Swift で複数の行に渡る長いテキストを扱うテキストエリアを作成するには UITextView を使用します。
今回は UITextView によるテキストエリア内で、現在カーソルが置かれている一行分のテキストだけを取得する方法について紹介します。
テキストエリアの行を取得するサンプル
テキストエリアと、行を取得するためのボタンのみがあるサンプルアプリのソースコードです。
プロジェクトを「Single View Application」のテンプレートで作成後にできる ViewController.swift を以下のように書き換えます。
import UIKit

class ViewController: UIViewController {

    // ステータスバーの高さ
    let statusBarHeight = UIApplication.shared.statusBarFrame.height

    // テキストエリアのインスタンス
    let textView = UITextView()

    override func viewDidLoad() {
        super.viewDidLoad()

        self.view.backgroundColor = UIColor.lightGray

        // テキストエリアの設定
        textView.frame = CGRect(x: 0, y: statusBarHeight, width: self.view.frame.width, height: 200)
        textView.text = "UITextView を使えば、数行に渡るテキストを\n表示・編集することができます。\n長いテキストを扱うアプリに使用します。"
        self.view.addSubview(textView)

        // 行を取得するボタン
        let button = UIButton(type: .system)
        button.setTitle("行を取得", for: .normal)
        button.addTarget(self, action: #selector(self.getCurrentLine), for: .touchUpInside)
        button.sizeToFit()
        button.center.x = self.view.center.x
        button.center.y = 300
        self.view.addSubview(button)
    }

    // カーソルのある行のテキストのみを取得
    func getCurrentLine() {

        let allText = textView.text! as NSString
        let currentLine = allText.substring(with: allText.lineRange(for: textView.selectedRange))

        print(currentLine)
    }

    override func didReceiveMemoryWarning() {
        super.didReceiveMemoryWarning()
    }
}
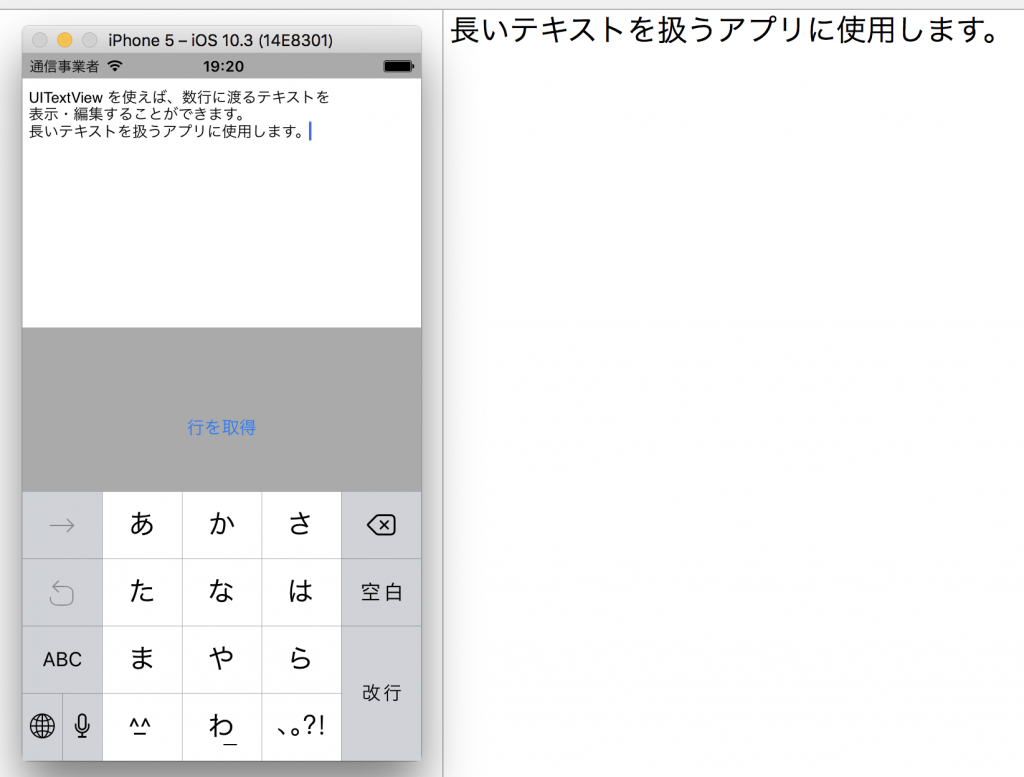
サンプルの実行例です。テキストエリア内の3行のテキストのうちのどこかにカーソルを置いてボタンを押すと、その行のテキストがコンソールに表示されます。
実際に行のテキストを取得するコードは以下の部分です。
    // カーソルのある行のテキストのみを取得
    func getCurrentLine() {

        let allText = textView.text! as NSString
        let currentLine = allText.substring(with: allText.lineRange(for: textView.selectedRange))

        print(currentLine)
    }
テキストエリアの全てのテキストを NSString に変換して、行のレンジ(NSRange)を取得するメソッド lineRange と、レンジによってテキストを抽出するメソッド substring を使用できるようにしています。
その後、抽出した行のテキストを表示しています。
以上が、UITextViewでカーソルのある行のテキストを取得する方法です。

