Table of Contents
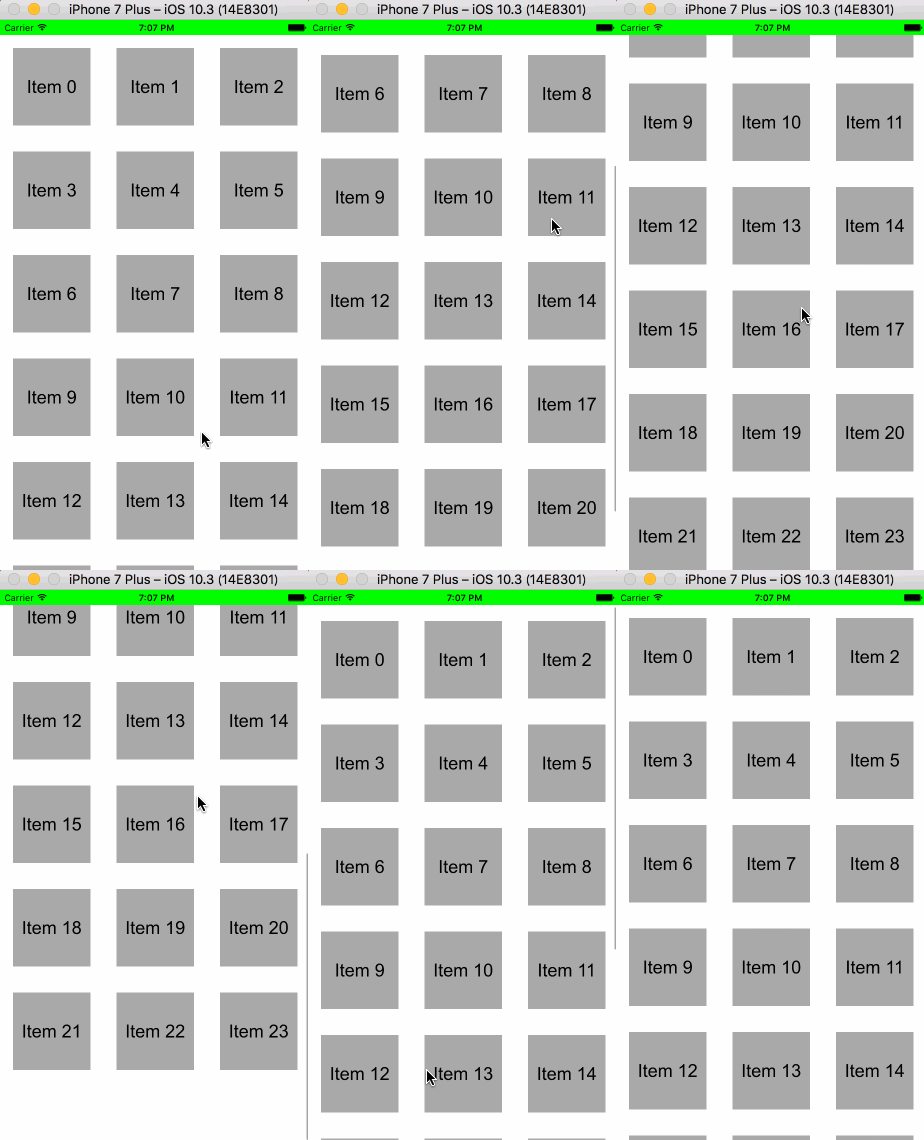
Swift で、以下のような上下左右にアイテムを並べたUI画面を作成したいときは UICollectionView が便利です。
サムネイル画像を大量に並べる、メディアファイル管理アプリなどで使用できます。
UITableView に似ていますが、UICollectionView は上下だけでなく、左右にも要素を並べやすいという利点があります。
今回は、実際に上の画像のアプリを作っているコードを通して、UICollectionView の基本的な使い方について紹介したいと思います。
サンプルの全ソースコード
Xcodeでプロジェクトを新規作成後にできる ViewController.swift を以下のように書き換えています。Storyboard は使用していません。
import UIKit

class ViewController: UIViewController, UICollectionViewDelegate, UICollectionViewDataSource, UICollectionViewDelegateFlowLayout {

    // ステータスバーの高さ
    let statusBarHeight = UIApplication.shared.statusBarFrame.height

    // セル再利用のための固有名
    let cellId = "itemCell"

    override func viewDidLoad() {
        super.viewDidLoad()

        // 画面全体を緑色に設定
        self.view.backgroundColor = UIColor.green

        // 大きさとレイアウトを指定して UICollectionView を作成
        let collectionView = UICollectionView(
            frame: CGRect(x: 0, y: statusBarHeight, width: self.view.frame.width, height: self.view.frame.size.height - statusBarHeight),
            collectionViewLayout: UICollectionViewFlowLayout())

        // アイテム表示領域を白色に設定
        collectionView.backgroundColor = UIColor.white

        // セルの再利用のための設定
        collectionView.register(UICollectionViewCell.self, forCellWithReuseIdentifier: cellId)

        // デリゲート設定
        collectionView.delegate = self
        collectionView.dataSource = self

        // UICollectionView を表示
        self.view.addSubview(collectionView)
    }

    // 表示するアイテムの数を設定(UICollectionViewDataSource が必要)
    func collectionView(_ collectionView: UICollectionView, numberOfItemsInSection section: Int) -> Int {
        return 24
    }

    // アイテムの大きさを設定(UICollectionViewDelegateFlowLayout が必要)
    func collectionView(_ collectionView: UICollectionView, layout collectionViewLayout: UICollectionViewLayout, sizeForItemAt indexPath: IndexPath) -> CGSize {

        let size = self.view.frame.width / 4

        return CGSize(width: size, height: size)
    }

    // アイテム表示領域全体の上下左右の余白を設定(UICollectionViewDelegateFlowLayout が必要)
    func collectionView(_ collectionView: UICollectionView, layout collectionViewLayout: UICollectionViewLayout, insetForSectionAt section: Int) -> UIEdgeInsets {

        let inset =  (self.view.frame.width / 4) / 6

        return UIEdgeInsets(top: inset, left: inset, bottom: inset, right: inset)
    }

    // アイテムの上下の余白の最小値を設定(UICollectionViewDelegateFlowLayout が必要)
    func collectionView(_ collectionView: UICollectionView, layout collectionViewLayout: UICollectionViewLayout, minimumLineSpacingForSectionAt section: Int) -> CGFloat {
        return (self.view.frame.width / 4) / 3
    }

    // アイテムの表示内容(UICollectionViewDataSource が必要)
    func collectionView(_ collectionView: UICollectionView, cellForItemAt indexPath: IndexPath) -> UICollectionViewCell {

        // アイテムを作成
        let cell = collectionView.dequeueReusableCell(withReuseIdentifier: cellId, for: indexPath)
        cell.backgroundColor = UIColor.lightGray

        // アイテムセルを再利用する際、前に追加していた要素(今回はラベル)を削除する
        for subview in cell.contentView.subviews {
            subview.removeFromSuperview()
        }

        // テキストラベルを設定して表示
        let label = UILabel()
        label.font = UIFont(name: "Arial", size: 24)
        label.text = "Item \(indexPath.row)"
        label.sizeToFit()
        label.center = cell.contentView.center
        cell.contentView.addSubview(label)

        return cell
    }

    // アイテムタッチ時の処理(UICollectionViewDelegate が必要)
    func collectionView(_ collectionView: UICollectionView, didSelectItemAt indexPath: IndexPath) {
        print(indexPath.row)
    }

    override func didReceiveMemoryWarning() {
        super.didReceiveMemoryWarning()
    }
}
アイテムをタップすると、コンソールにタッチしたアイテムの番号が出力されます。基本的な動作に関しては、コード内に記述したコメント通りです。
アイテムの列数は、アイテムの横幅および左右の余白によって自動的に決まるため、自分で指定する必要はありません。
レイアウトを設定するクラス UICollectionViewFlowLayout
UICollectionView を使用する場合、アイテムの並べ方を規定するクラス UICollectionViewLayout を継承したクラスの指定が必要になります。
今回は最も基本的なレイアウトである UICollectionViewFlowLayout を指定しています。これは、単純にアイテムを横に並べていくレイアウトです。横幅が表示領域を超えた場合、自動的に次の行に移ります。
...
// 大きさとレイアウトを指定して UICollectionView を作成
let collectionView = UICollectionView(
    frame: CGRect(x: 0, y: statusBarHeight, width: self.view.frame.width, height: self.view.frame.size.height - statusBarHeight),
    collectionViewLayout: UICollectionViewFlowLayout())
...
また、デリゲート UICollectionViewDelegateFlowLayout は、このレイアウトにおけるアイテムの大きさや余白の設定に必要です。
その他のデリゲートの設定や動作は UITableView とほとんど同じです。
さらに詳しい動作に関しては、以下の公式ドキュメントを御覧ください。

