Table of Contents
複数の要素を並べて表示する NSTableView の Swift によるプログラム的な作成方法と、各行の要素をドラッグ&ドロップで並び替え可能にするためのコードについてです。
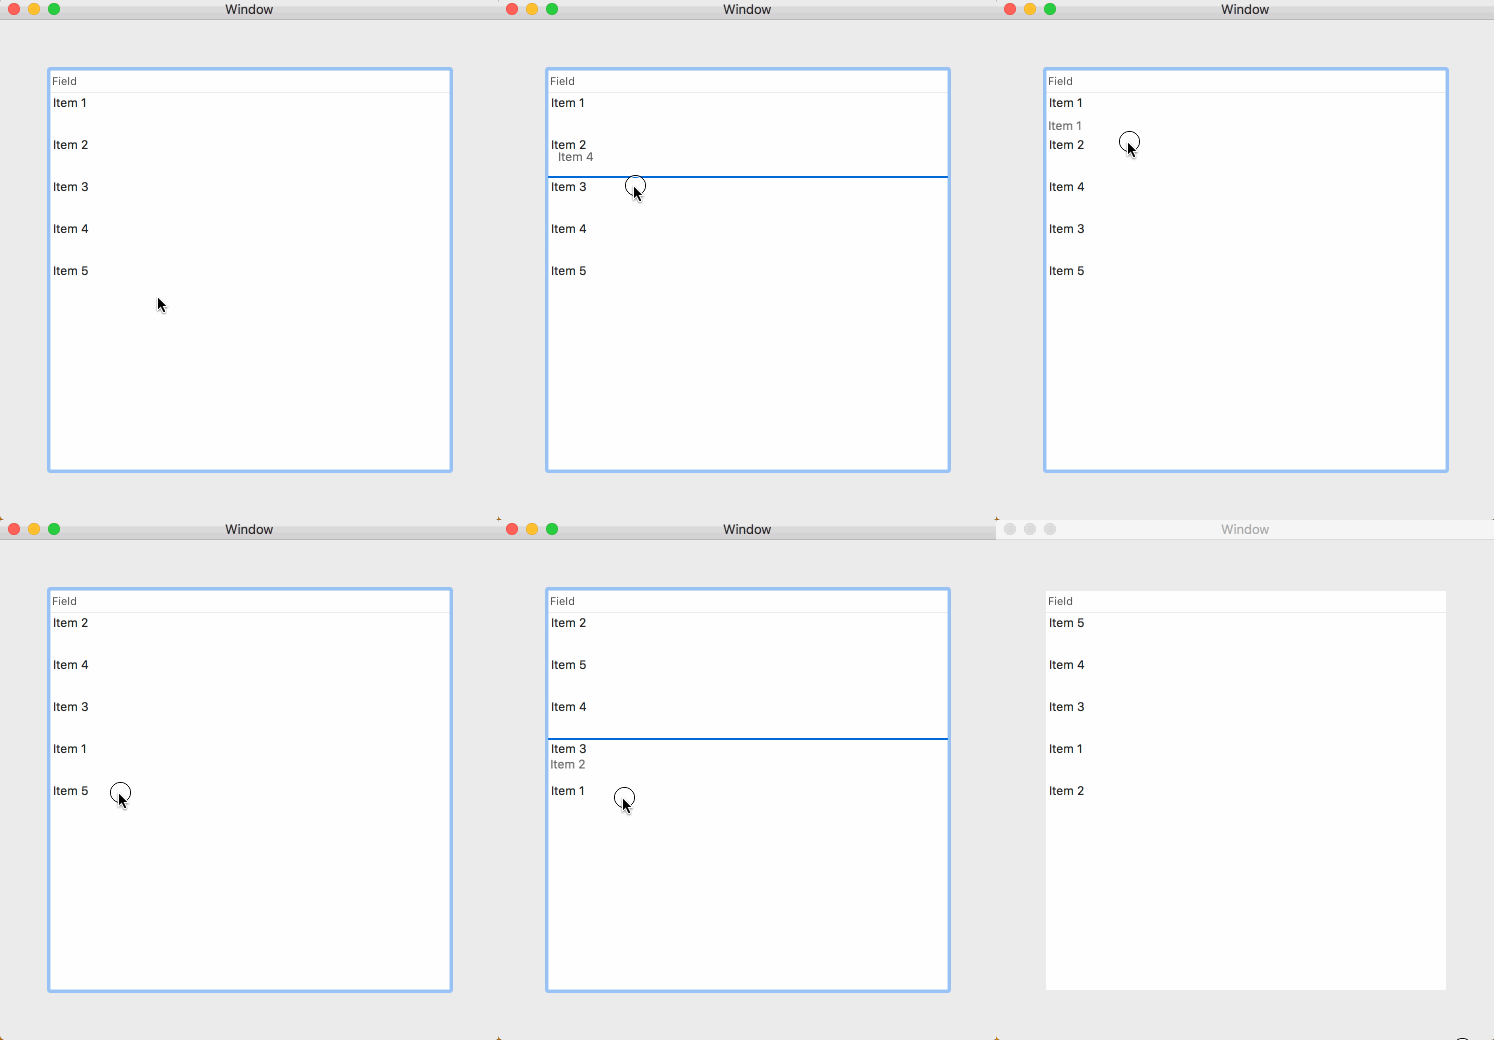
以下のような、テキストのみの要素を一列に表示する簡単な NSTableView のサンプルを作ります。
サンプルのソースコード
Cocoa Application のプロジェクトを新規作成し、生成される ViewController.swift を以下のように変更します。
import Cocoa

class ViewController: NSViewController, NSTableViewDelegate, NSTableViewDataSource {

    // 表示する要素
    var tableViewData: [String] = ["Item 1", "Item 2", "Item 3", "Item 4", "Item 5"]

    // セルのUTI
    let DRAG_TYPE = "public.data"

    override func viewDidLoad() {
        super.viewDidLoad()

        let tableViewWidth: CGFloat = 400

        let tableView = NSTableView(frame: NSRect(x: 0, y: 0, width: tableViewWidth, height: 400))
        tableView.dataSource = self
        tableView.delegate = self
        tableView.registerForDraggedTypes([NSPasteboard.PasteboardType(DRAG_TYPE)])

        // 列の設定
        let tableColumn = NSTableColumn(identifier: NSUserInterfaceItemIdentifier("column"))
        tableColumn.width = tableViewWidth
        tableView.addTableColumn(tableColumn)

        // NSTableView を NSClipView に設定
        let scrollContentView = NSClipView(frame: NSRect(x: 0, y: 0, width: 400, height: 400))
        scrollContentView.documentView = tableView

        // NSClipView を NSScrollView に設定
        let scrollView = NSScrollView(frame: NSRect(x: 50, y: 50, width: 400, height: 400))
        scrollView.contentView = scrollContentView

        self.view.addSubview(scrollView)
    }

    // 行数
    func numberOfRows(in tableView: NSTableView) -> Int {
        return tableViewData.count
    }

    // 各行の要素(セル)
    func tableView(_ tableView: NSTableView, objectValueFor tableColumn: NSTableColumn?, row: Int) -> Any? {
        return NSCell(textCell: tableViewData[row])
    }

    // 行の高さ
    func tableView(_ tableView: NSTableView, heightOfRow row: Int) -> CGFloat {
        return 40
    }

    // 以下ドラッグ&ドロップのための設定

    func tableView(_ tableView: NSTableView, validateDrop info: NSDraggingInfo,
        proposedRow row: Int, proposedDropOperation dropOperation: NSTableView.DropOperation) -> NSDragOperation {

        if dropOperation == .above {
            return .move
        }
        return []
    }

    func tableView(_ tableView: NSTableView, writeRowsWith rowIndexes: IndexSet, to pboard: NSPasteboard) -> Bool {

        // IndexSet の情報を NSPasteboard に保持させる
        let data = NSKeyedArchiver.archivedData(withRootObject: rowIndexes)
        pboard.declareTypes([NSPasteboard.PasteboardType(DRAG_TYPE)], owner: self)
        pboard.setData(data, forType: NSPasteboard.PasteboardType(DRAG_TYPE))

        return true
    }

    func tableView(_ tableView: NSTableView, acceptDrop info: NSDraggingInfo, row: Int, dropOperation: NSTableView.DropOperation) -> Bool {

        // NSPasteboard から行の情報を取り出す
        let pasteboard = info.draggingPasteboard()
        let pasteboardData = pasteboard.data(forType: NSPasteboard.PasteboardType(DRAG_TYPE))

        if let pasteboardData = pasteboardData {

            if let rowIndexes = NSKeyedUnarchiver.unarchiveObject(with: pasteboardData) as? IndexSet {

                tableView.beginUpdates()

                for oldIndex in rowIndexes {

                    print(oldIndex) // 元の位置
                    print(row) // 移動後の位置

                    if oldIndex < row {
                        // 要素を下に移動させる場合
                        tableView.moveRow(at: oldIndex, to: row - 1)

                        let oldElm = tableViewData[oldIndex]

                        tableViewData.remove(at: oldIndex)
                        tableViewData.insert(oldElm, at: row - 1)

                    } else {
                        // 要素を上に移動させる場合
                        if row < tableViewData.count {
                            tableView.moveRow(at: oldIndex, to: row)

                            let oldElm = tableViewData[oldIndex]

                            tableViewData.remove(at: oldIndex)
                            tableViewData.insert(oldElm, at: row)
                        }
                    }
                }

                tableView.endUpdates()

                return true
            }
            print("failed")
        }
        return false
    }
}
viewDidLoad における処理
NSTableView は単独ではなく NSScrollView および NSClipView と共に動作します。また、1つの NSTableView には複数の列を表示できるため、表示する列の数だけ NSTableColumn を追加します。
今回のサンプルでは一列のみ表示させるため NSTableColumn はひとつだけ追加しています。
基本動作やドラッグ&ドロップによる並べ替え機能を実装するためには NSTableViewDataSource および NSTableViewDelegate の2つのプロトコルが必要です。
ドラッグ&ドロップ可能なデータタイプ(UTI)は registerForDraggedTypes で設定します。このサンプルでは public.data です。
ドラッグ&ドロップによる並び替え処理
並び替えの処理には、以下のメソッドを使用します
- tableView(_:validateDrop:proposedRow:proposedDropOperation:)
- tableView(_:writeRowsWith:to:)
- tableView(_:acceptDrop:row:dropOperation:)
ドロップしたときに起こる実際の並び替え処理は tableView(_:acceptDrop:row:dropOperation:) における beginUpdates と endUpdates の間で行われます。
...

for oldIndex in rowIndexes {

    print(oldIndex) // 元の位置
    print(row) // 移動後の位置

    if oldIndex < row {
        tableView.moveRow(at: oldIndex, to: row - 1)

        let oldElm = tableViewData[oldIndex]

        tableViewData.remove(at: oldIndex)
        tableViewData.insert(oldElm, at: row - 1)

    } else {
        if row < tableViewData.count {
            tableView.moveRow(at: oldIndex, to: row)

            let oldElm = tableViewData[oldIndex]

            tableViewData.remove(at: oldIndex)
            tableViewData.insert(oldElm, at: row)
        }
    }
}

...
moveRow は、ある番号の要素を指定した場所に移動するアニメーションを行うメソッドです。あくまで移動アニメーションを行うだけであり、実際の要素の並び替えが起こるわけではないので、その処理は別に書く必要があります。
このサンプルでは、実際の配列の要素を削除(remove)と挿入(insert)によって移動させています。要素の移動方向によって挙動が異なるため、場合分けを行っています。
以上、要素の並び替えができる NSTableView についてでした。


大変参考になりました。
Macのプログラミング資料は本当に貴重です。
最近は書籍もほとんどないし、Appleもかみ砕いた資料はほとんど出さなくなったし。